Setting Up Google AdSense with WordPress
One of the areas I’ve gotten interested in recently is using Google AdSense to help monetize WordPress websites. It’s not something I’ve had much experience with, as most of the sites I create and maintain are not blogs. I deal mostly with e-commerce and other business sites that don’t aim to make money through ads. Until lately, that is, when I’ve had the pleasure of working with a few professional bloggers. Having seen the power of Google AdSense and other ad networks on high volume sites, I decided to give it a whirl on my own blog.
In this post, I’ll write about my experience with Google AdSense and WordPress. We’ll cover how to setup your AdSense account and the best way to get quickly get ads displayed in different areas of your blog.
Setting Up AdSense
Clearly the first step is to setup your AdSense account, which you can do by clicking here and clicking the Sign Up Now button. If you have a Google account already, you’ll be prompted to login; if you don’t have one, you’ll need to spend a few minutes creating one. Note that part of the signup process requires you to provide your website URL, which has to be validated by the AdSense team. This does require you to insert a JavaScript snippet into your site, which can be done any number of ways. You can always utilize a child theme to add the JavaScript directly to your header, or your theme might offer a way to insert custom JavaScript into the header.
For me, I decided to use a plugin that allows you to insert custom scripts and markup into the header and footer areas. Not surprisingly, the plugin is called Insert Headers and Footers and is available for free in the WordPress repository, meaning it can be installed using normal WordPress plugin installation. Once installed and activated, it’s very simple to add the AdSense code into the header area of all your pages and posts. Just click Settings > Insert Headers and Footers, and paste the JavaScript code from AdSense into the top text area and click Save.
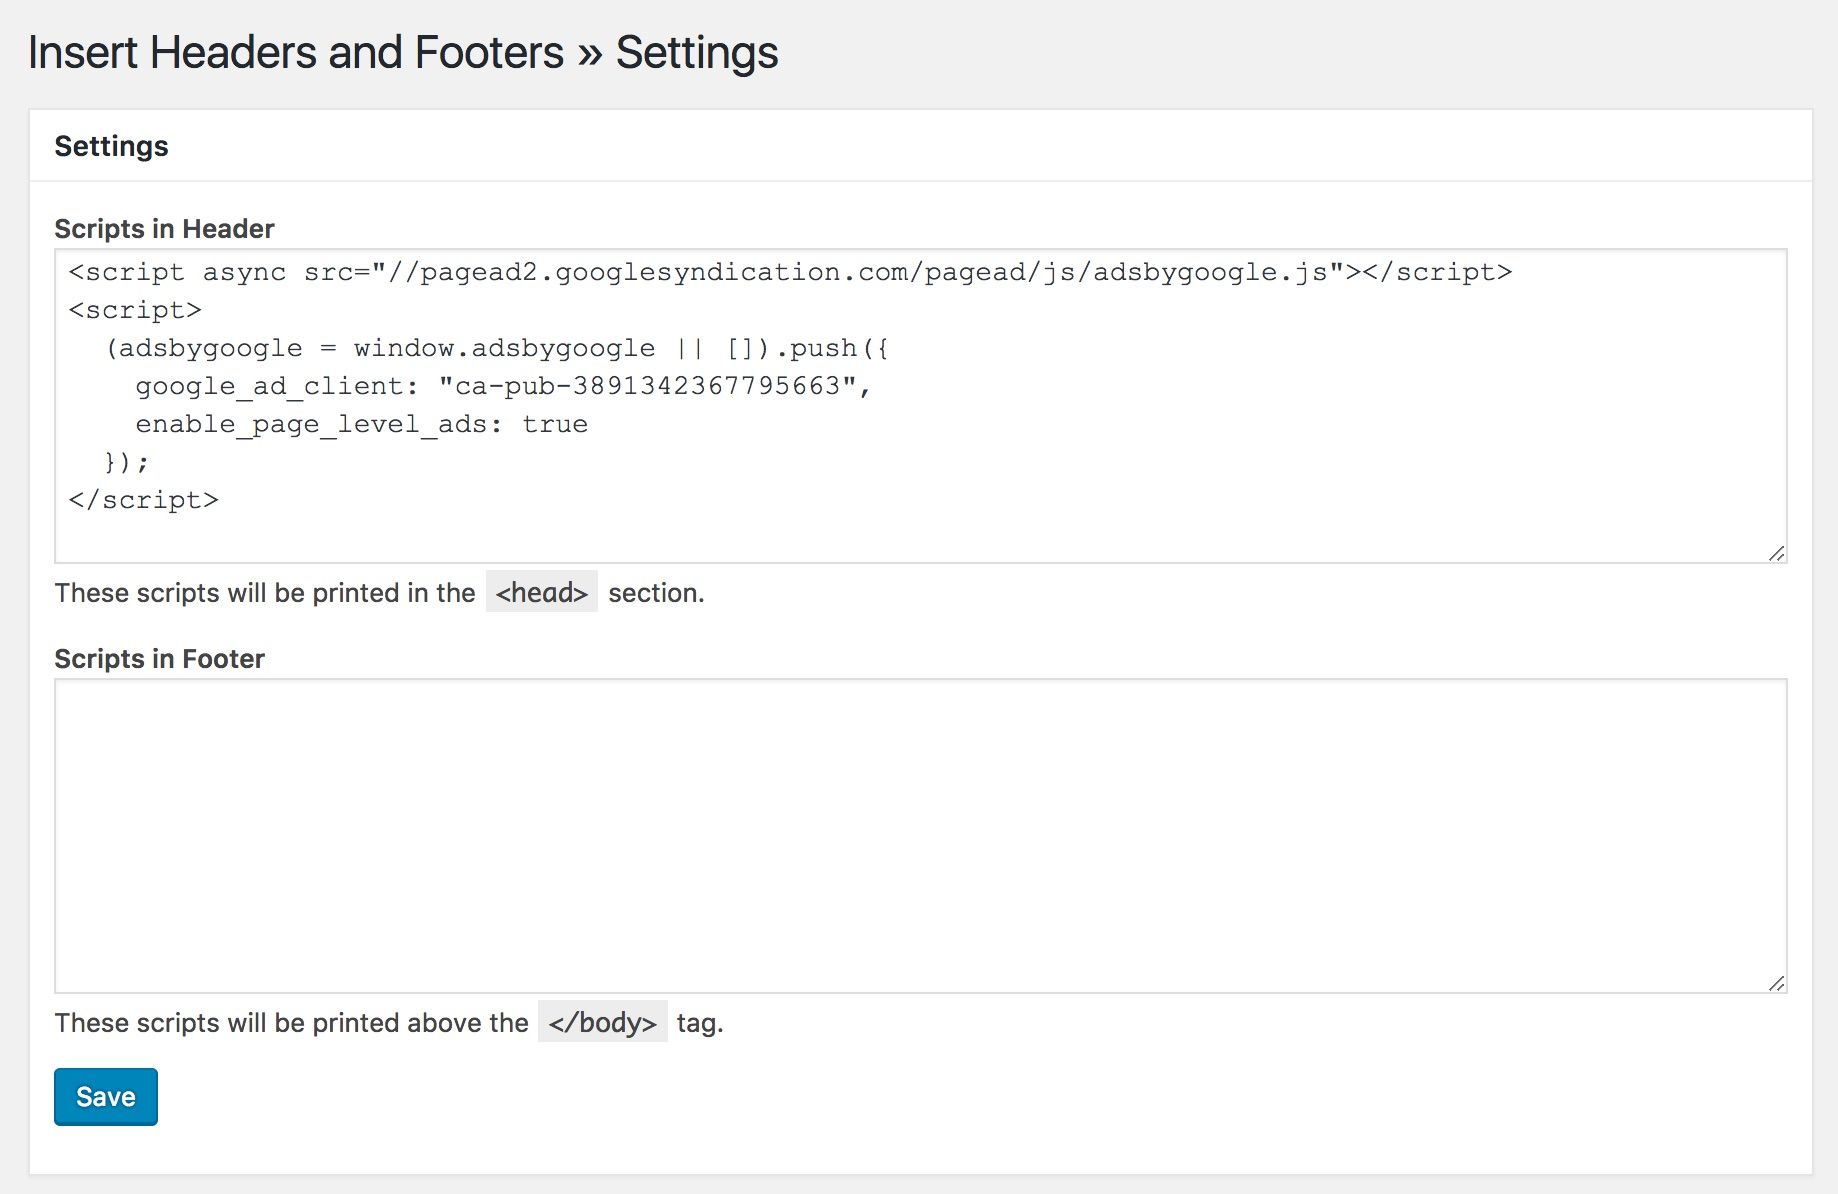
That’s it for setup. Now you’re ready for the AdSense team to approve your account. They say it takes a few days, but my experience was that it only took about half a business day. Once your AdSense account is approved and you’re able to login, you’ll have two main options for setting up ads, which we’ll discuss in detail below.
Page-Level Ads
Page-level ads are by far the quickest and simplest way to get start with AdSense, but they’re also the least flexible. They’re simple because there is no additional code beyond the initial JavaScript you did earlier to setup your account, and because they can be enabled with a single click in the AdSense.

Once you enable page-level ads, you’ll start seeing ads on your site within minutes. The drawback, however, is that you have no control over where the ads get placed and when they are shown. The AdSense algorithm determines “optimal” times to show ads and where to place them on your page, so you will have no control over them. In my experience, page-level ads typically were placed at the very bottom of pages, which may or may not be desirable.
The other thing to keep in mind with page-level ads is that any page with the JavaScript can have ads displayed. The method we used previously to inject the snippet into the header of each page would mean ads would be displayed on every single page of your site. This may be fine for most users, but some users may only want ads on specific pages or types of pages. If that’s the case for you, you’ll need to consider a different method of injecting the JavaScript snippet we used earlier. You could customize your theme’s header.php template or use the wp_head hook to add content to the header of pages using conditional logic. Just remember to make a backup before modifying anything in your theme (and always use a child theme).
Ad Units
The other way to get AdSense on your WordPress site is to create Ad units. This method is definitely more complex and takes a little more time to setup, but you’ll have a lot of control over which pages show ads, where the ads get displayed, and what the ads look like. This is the method I use for this site, and I’ll walk you through setup.
The first step is to install a plugin on your WordPress site. I use an amazing free plugin called Ad Inserter. It’s in the WordPress repository and can be installed like any other plugin. As of this writing it is averaging a 4.9 star rating with over 70,000 active installs. It’s by far the best WordPress AdSense plugin I found in my research. The free version supports up to 16 ad units, and if you need more than that the pro version supports up to 64. The pro version also gives you more options about where to insert ads relative to content, better preview options, A/B testing, and more. But for our purposes, the free version is plenty powerful.
Once the Ad Inserter plugin is installed, it’s time to decide where you want your ads to display on your site. Picking ad locations is a blend of science and art to ensure optimal revenue without annoying your visitors, so it may take a little trial and error. Each location of an ad on your site is a unique Ad unit. So, if you want 2 ads in a sidebar, you’d need to create 2 ad units for those. If you want an ad at the bottom of every blog post, that would be a single ad unit. Each ad unit can have it’s own style and layout, which is great for when you want to mix and match ads in different parts of your site (posts, sidebars, footers, etc).
As an example, let’s take a look at the following scenario and see how we would setup both the ad unit in AdSense, as well as the Ad inserter plugin:
- One ad in a sidebar
- One ad at the top of each page.
- One ad after the 5th paragraph of each blog post.
- One ad at the bottom of each blog post.
This is a simple setup, with the goal being to acclimate you to both AdSense and Ad inserter configuration. If you can get these 3 ads setup, hopefully you’ll see it’s easy to create more ad units for different areas of your site.
To start, let’s create the three ad units in AdSense. This can be done under Content > Ad units, and then clicking New ad unit. For the most part, creating a new ad unit is straight forward. You’ll first select the type of ad:
- Text & Display: Standard way to display an ad. You’ll be able to choose a size and layout. These are are great for most use cases.
- In-feed: These are designed to fit inside a feed of data, similar to your Facebook timeline. These work well with WordPress archive pages or blog feeds where you have a scroll of multiple post summaries in a list.
- In-article: These are great for inserting into WordPress blog posts as they are designed to fit seamlessly into paragraph breaks.
Since we have 4 places we want to insert an ad, we’ll need 4 ad units. Let’s start with the sidebar ad unit. For that, we’ll use a Text & Display ad in a vertical orientation. Remember to give each ad unit a meaningful name so that you can easily track and manage them later.
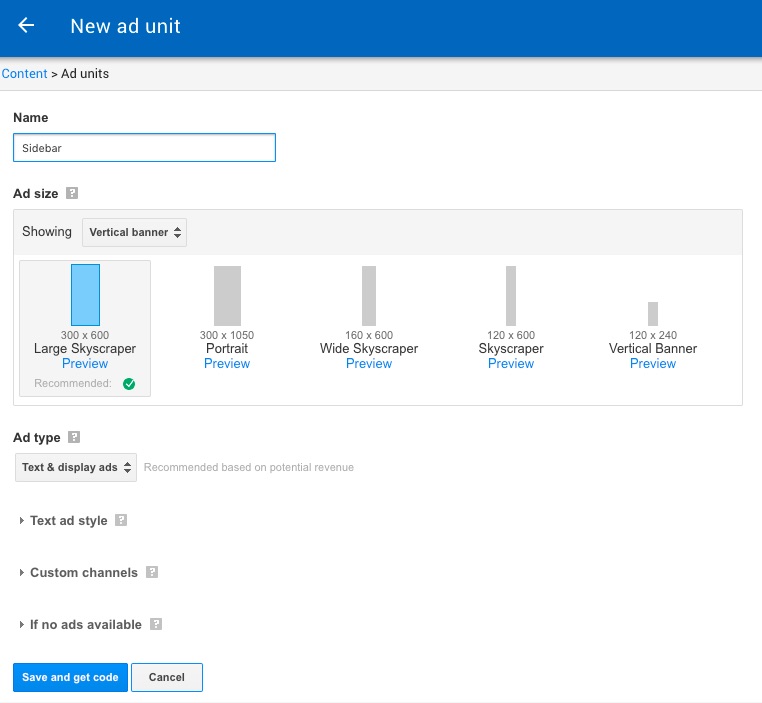
Feel free to play around with style and some of the other settings, but I find the defaults work fine.
For the remaining 3 ad units, rather than show each one, I’ll summarize what type and layout they should be:
- Top Of Page: Text & Display ad with Leaderboard layout
- 5th Paragraph: In-article ad
- Bottom of Post: Text & Display ad with Large Rectangle layout
When you’re done creating all 4 ad units, you should see the following ads:

Notice that each ad unit has a meaningful name so that we can easily identify it in reports and edit them later if needed. For example, we may find the leaderboard layout performs better, so we might consider converting the end of post ad unit to use the same layout. Having meaningful names will make this easier down the road.
Now that we have ad units, it’s time to make them show up on the site. This is where the Ad Inserter plugin comes into play. You need to copy the JavaScript code for each ad unit into one of the blocks in Ad inserter (each ad gets its own block). Let’s walk through them one by one, since each ad has its own display requirements.
Note: After you create each ad block in the plugin and have all the settings just right, remember to click the Save All Settings button. It’s easy to miss because it blends in with the other UI components, and it’s no fun when you make a lot of changes and forget to save them.
First, the sidebar ad, which is a little more tricky since sidebars are driven by your WordPress theme and the Ad inserter is blissfully unaware of sidebars. To insert the ad, we have to create a normal WordPress widget. The widget could simply contain the JavaScript Adsense code and be done, but the Ad inserter does provide short codes. And since the Ad inserter plugin provides some really nice conditional logic around displaying ads, it makes sense to create the ad block and use a short code instead of the raw JavaScript.
That said, inside Ad inserter, paste the JavaScript for the sidebar ad into the first block. Make sure both the Pages and Posts checkboxes are selected, as well as the short code checkbox (you’ll need to click the Manual button to show this checkbox). Also make sure automatic insertion is disabled for this block.
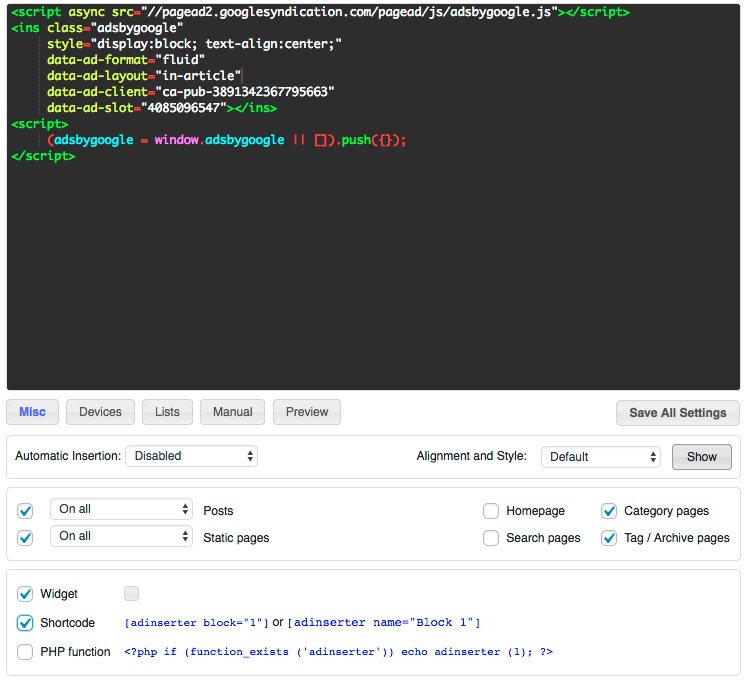
The final step is to create a text widget in your theme’s sidebar area and paste the short code text that Ad inserter provides. This is no different from creating any other text widget, simply click Appearance > Widgets, select the Text widget and place into the sidebar area, then paste the short code. That’s it!
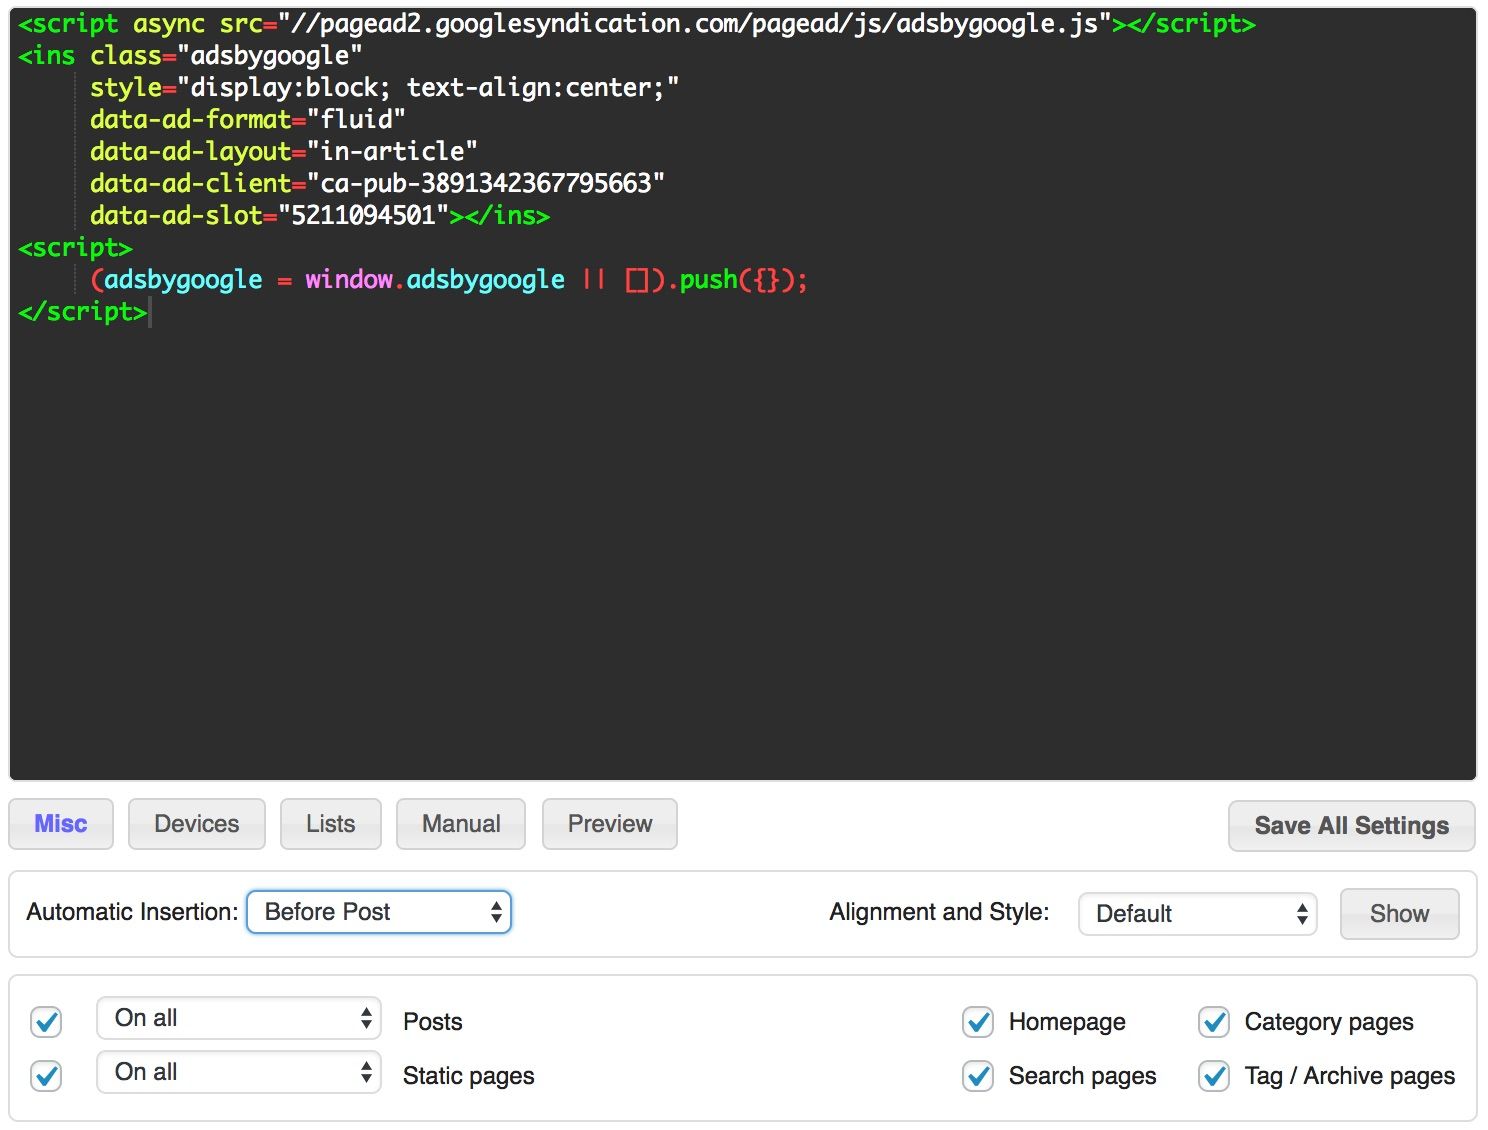
Now we can move on to setting up the remaining ad units, which will be done solely using the Ad inserter plugin interface. Next up is the Top of Page ad unit. Again, copy the JavaScript code from AdSense and paste it into the next available ad block (presumably this will be #2). This time, you want to configure it as follows: display on all Posts and Static pages, Home Page, Category pages, Tag/Archive pages, and Search pages. Also set the Automatic Insertion value to Before Post to ensure it’s at the top (will still be placed below any header that your theme uses). Here’s what it all looks like:
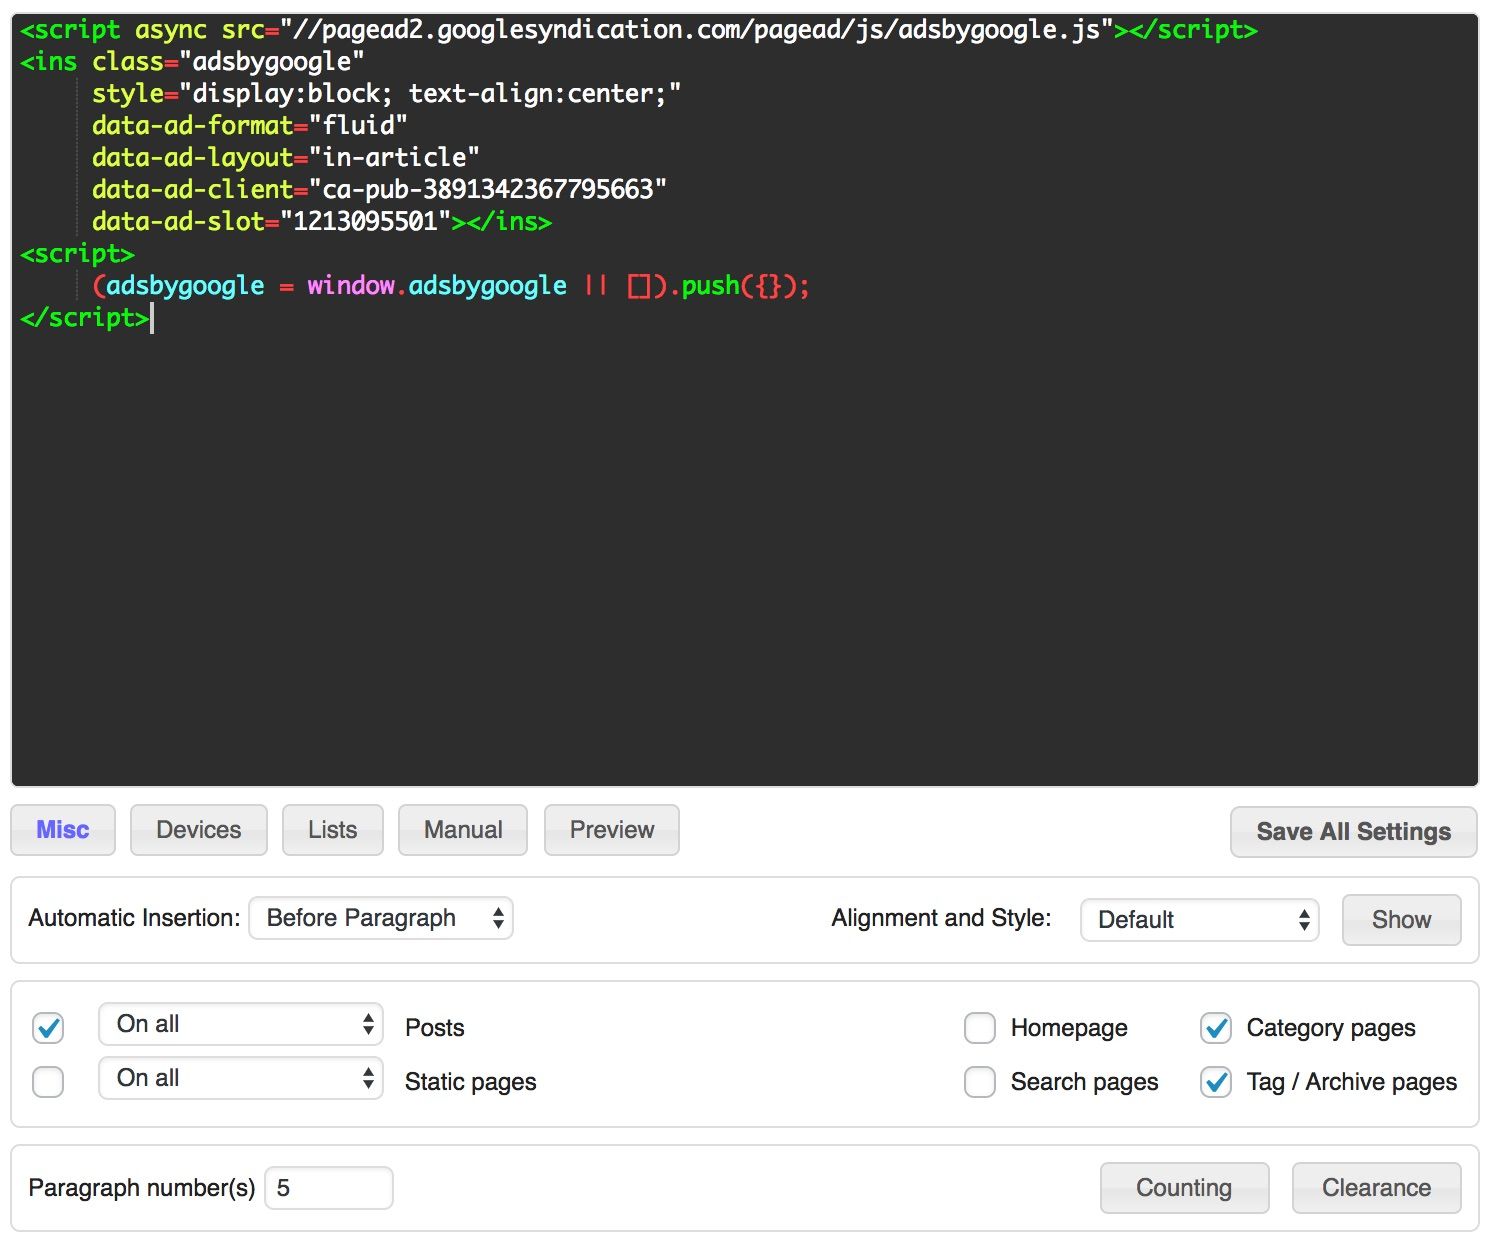
Next we have the 5th paragraph ad unit. This will be slightly different than before as we’ll only configure it for Posts, and we’ll set some additional parameters to only display it before the 5th paragraph. To do this, copy and paste the JavaScript from AdSense into the 3rd ad block. Then set the following: Automatic Insertion is Before Paragraph, only Posts should be check, though you can also apply to Category and Tag/Archive pages if you like. A new field will be visible that asks you to specify the paragraph number, which should be set to 5. Here’s a preview of what it all looks like put together:
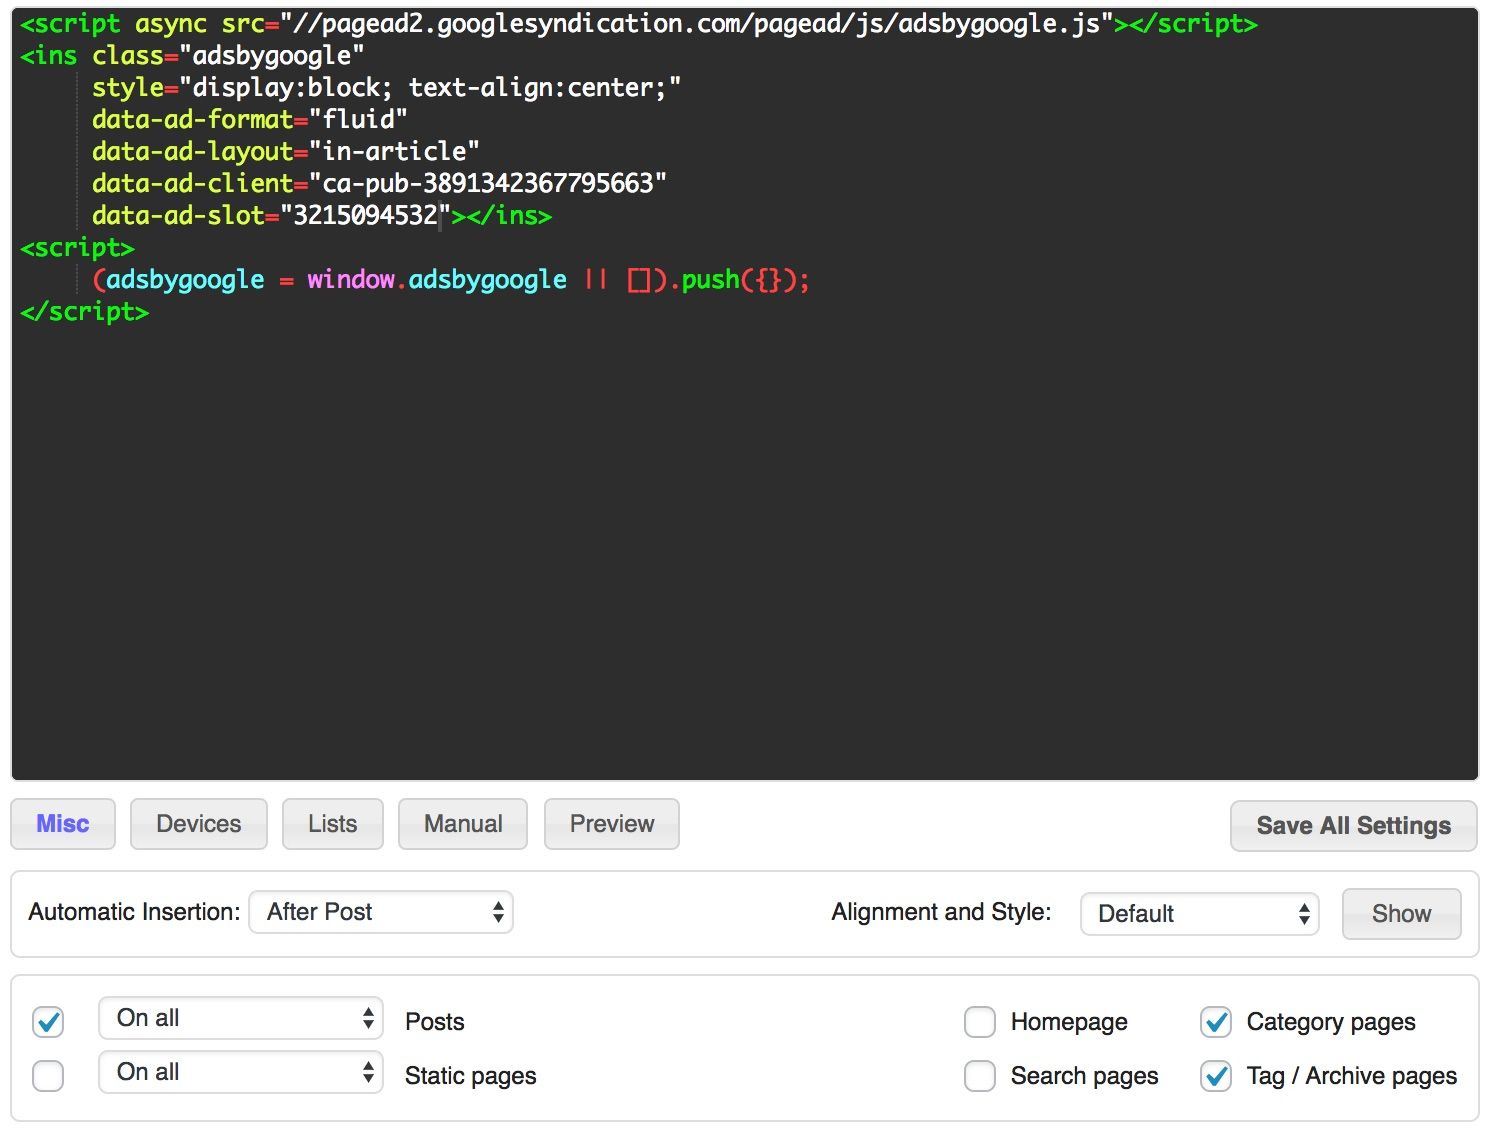
Finally, the last ad unit will be placed at the bottom of every blog post. This is basically a cross between the last two ad units. You’ll configure as follow: Automatic Insertion should be set to After Post, though it could also be set to After Comments if you really want it at the bottom of the page. Also set to Posts only (uncheck Pages), and again you may optionally wish to enable for Category and Archive pages. That’s it, and the finished settings should look like:
Summary
If you’re wondering how it all looks together in action, just look around this page. The examples above are very close to what I use on this site, save for the ads on pages (I only want ads to display on my blog posts). I go above and beyond the 5th paragraph unit, and have setup units to display at regular paragraph intervals: 4, 10, 16, 22, etc. Again, there is a bit of science and art involved here, and I’m always tweaking the spacing to see how ads perform. My goal is to write meaningful content about WordPress, and I don’t want the ads to get in the way too much and turn away readers.
In the end, where and how you display ads is a personal choice. Using the Ad inserter plugin makes it really easy to create complex rule sets across all of your content. Make sure you track ad unit performance and adjust as necessary. And also keep in mind the Ad inserter plugin works with more than just AdSense. Any ad network that lets you create individual ad units will work this plugin, making it one of the best options for working with Google AdSense and WordPress, or any other ad network.
